Embossing Techniques: A complete guide for beginners
Hi Friends,
I will be sharing a few different ways of embossing.
What is Embossing?
Embossing is the practice of creating a raised design or text on the surface of your card, paper or other materials you may be using in your paper crafting.
Texture is so important. Embossed surfaces are not only nice to look at, but it's also tactile and it's a great empty space filler!
Embossing adds a subtle finish to your paper crafting, giving it extra dimension and interest. You can choose to leave it plain or if you really want to enhance the design you can use with colour. You can achieve an embossed effect using readily available craft products on the surface (such as embossing powder or texture paste) or using pressure to create the raised effect with dry embossing.
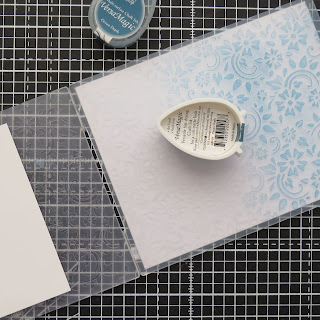
Embossing using Embossing Folders
An Embossing Folder is a folder that has been designed
to go through a die-cutting machine. Rather than cutting the card as a die
would, instead, the design of the folder creates an embossed pattern. On the
lower inside of the folder, the design is raised and on the upper inside of the
folder, it is recessed.
The embossing folder clamps down hard on the card when put
under pressure from the embossing (or die-cutting) machine in the same way as
passing fabric through a mangle. You may need to adjust the 'sandwich' on your
die-cutting machine to achieve a more prominent effect.
This technique looks fantastic when applied to acetate.
Wet Embossing
Traditional wet embossing involves thoroughly dampening the
card and using raised designs to create an embossed effect once the paper dries.
Heat Embossing
Heat embossing involves stamps or embossing pens, embossing
ink, embossing powder and a heat gun to melt the powder and create a raised
design. There are so many products available and so many different that effects
you can achieve!
Heat Embossing - Step-by-Step
1. Stamp an image using embossing ink - this is usually a
clear ink and is essentially a kind of liquid glue in the form of a stamping
pad. You can also buy embossing ink pens for very detailed embossing or to
create your own designs. For some reason, this does not work well with Watercolour
Paper!
2. Pour over the embossing powder covering all of your inked
areas. It's a good idea to use an anti-static wipe on your card to avoid any
powder adhering to other areas of the card.
3. Just as you would do when adding glitter, pour off the
excess which can be reused. You may need to give it a good tap to make sure all
the loose powder is removed.
4. Using a heat tool (not a hairdryer!) heat up the
embossing powder, taking care not to overheat. You may find heating from under
the card creates a smoother effect. You'll be able to see once the powder
begins to melt and transform into an embossed design.
Experiment! You will find all different colours and types of
embossing powders - including glow-in-the-dark and beautiful metallic colours!
Dry
Embossing Technique with a Stylus and Stencil
Dry embossing using a stylus and stencil is a simple technique
to get you started and ideal for small projects. Place your card or paper over
the stencil and using the stylus which is like an inkless pen with a little
ball on the end, you simply apply pressure to the card following the design of
the stencil. Then flip the card over and you'll see the raised design.
Embossing stencils are often made of brass but you can use
general plastic stencils which are designed to be used with colour.
Have you used all these techniques? Which one do you prefer? Let me know in the comments below.


Comments
Post a Comment
Hi, I love to hear your views good, bad and even ugly... If you like something let me know so i can do more of it, if not, i will try and do less. Thank you SO MUCH for taking the time to comment, I really enjoy reading what you think about the blog xx