Posts

Showing posts from May, 2012

Pennant/ Bunting Tutorial

Image
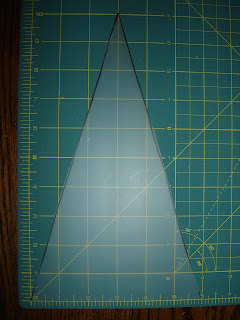
While looking for ideas for Chloes Priness Bedroom , I ran across several that had super cute pennant banners decorating them. I had to make some for myself! I found this fabulous tutorial by Becky Kay  Here's how I did it! To make two 3 yard long banners, I bought 1/2 yard of 4-5 different fabrics and two packs of double fold bias tape (3 yrds long).     I created a plastic triangle template with a 6 inch base and 10 inch height. Who knew I'd ever use that geometry I learned in high school? Fold a piece of fabric in half, right sides together, matching the selvedges. If you place the base on the triangle along the bottom edge of the fabric and cut, then turn the template upside down so the point is at the bottom edge and cut, you should be able to cut 10 triangle pairs from a 1/2 yard of fabric. You're cutting through 2 layers of fabric, so you should have two identical triangles. Keep the pair together! 5 different fabrics will leave you with enough extra trian

DIY for Fathers Day

Image
Looking for some fun crafts to make for DAD? Father’s Day is around the corner so here is some of my favourite tutorials for Dad! Happy Father’s Day! BOW TIE WRAP Wrap little gifts + treats with bow ties or neck ties! Simply wrap bow ties around simple, wrapped boxes. Choose a simple wrapping paper and matching bow tie. Consider visiting vintage stores to find old bow ties in unique prints. Or pull out scrap paper and markers to make your own bow ties (great for the kids)! Ideas from Martha Stewart NECK TIE WREATH Turn Dad’s old ties into door decor. You’ll need a 14-inch wire wreath form from a crafts shop and 19 ties. Cut all ties but one into 15-inch lengths. Position the narrow end of first cut tie, front side up, on a section of the wreath. Wrap tie around form until pointed end is positioned as shown, hiding the rolled tie; secure with pins. Repeat, overlapping ties slightly. Flip wreath over; sew rolled-up ties to the backs of points. Pin on the uncut, bowed tie. NUTS

Mod Podge Sunglasses

Image
The sun has FINALLY arrived!!!!!!!!    So, why not bling up those old glasses and give your self a designer look, for minimum cost. All you need is mod podge, and paper, its so easy to do... For Full instructions, please visit  Mod Modge Rocks Feel free to Visit the Blog | Follow on Pinterest | Follow on Facebook | Follow on Twitter |Follow on Instagram Subscribe to Pretty Shabby UK

Laundry Sack Tutorial

Image
To be truthful, laundry is one of my least favourite things to do. There is not much you can do to make the chore fun. Although there is nothing you can do to make the laundry more pleasurable, you can however use a lovely laundry sack to store your clothes that are waiting their turn for the washer and dryer. The finished sack measures approximately 21" X 23" and it holds one person's laundry for the whole week. But, if you are anything like me its about 2 days laundry.  My kids just attract dirt. This bag is not only adorable, but it is handy if you are lacking space for a hamper. You can also tote this on vacation to hold all of your dirty clothes. The first step is to gather all of your supplies.  Whilst most of my projects are spur of the moment, I used to find my self running round like a blue bottomed fly getting the bits I had forgotten initially. Picking fabric is part of this step, so have fun and find something eye-catching and c

Nuts and Bolts Photo Frame

Image
Do you want to make a fantastic and Unique Fathers Day Present? Difficulty:  Very Easy Age: 5 and up (Parental supervision is recommended) What you'll need: Small wooden frame Black acrylic paint Washers and bolts Permanent adhesive glue Photograph of you How to make it: Remove glass from frame. Paint frame black and let dry. Use permanent adhesive glue to decorate outside of frame with nuts and washers. Let dry completely. Insert a family photo and the glass into the frame. Tips: Try to find a photograph that shows you riding your toy car or helping Dad in the driveway. If you use Super Glue, remember to be careful….. It is probably best to ask your mum to help you out here. Need more  Fathers day crafts ??

Top Breast Cancer Crafts Fundraising Ideas

Image
As you know, Breast Cancer awareness is a charity that is close to my heart. I have been fundraising for the charity for years, so when I saw these Breast cancer crafts I thought it would not only give me the opportunity to bring the charity to your attention, but also give some ideas to those who need fundraising ideas. For the Cross Stitchers This Item is Hand Stitched with Love on a Light Pink Plastic Canvas. Cross Stitched in a Rose Coloured Yarn is the words “I AM STRONG”, in between a Pink Cancer Ribbon stitched in half cross stitch with different shades of pink to give a 3 Dimensional Shadowing Effect. The rest of the Canvas is half cross stitched with white yarn to accentuate the pink, and to complete it is rimmed with a pastel pink edging with crocheted yarn for hanging. I love this little cross stitch plaque from Jessica.     I think this could quite easily be adapted to make a fantastic keyring. Breast Cancer Fundraiser Embroidery Pattern by Happy Sew Luc

Zebra Print Ikea Hack

Image
With the success of my Ottoman yesterday (you can just see it peaking in the background), I decided to put another one of my ideas into practice. I love Ikea , it is the one shop that I impulse buy in far too much..... Few years ago I bought two "Rast" bedside tables for our bedroom. Since moving house last year, I had no use for them as bedside tables.  So they were just rattling round the house from one room to another when organised a room.  I hate throwing out furniture.....(hording) So out came the old faithful black gloss (amazing bargain from Poundland ) and the fabric that was left over from the Zebra Print Ottoman , an old pillow, few tack and a hammer.... and voila........ We have a fantastic padded stool for my dressing table, for a grand total of £0.00... I love Zebra print at the moment... Do you? why not check out the ottoman tutorial HERE  or the Wreath  tutorial I made a few months ago HERE

Zebra Print and paint Ottoman for only £1.00

Image
I bought my ottoman over 18 months ago for a bargain of £1.00, it was tucked away in a corner of a car boot sale sale, piled up with goods on top, but it called to me.... The base was in pretty good condition, but as you can see the fabric was well.....it had seen better days. There was paint on it and it was threadbare at the corners.  Not to mention it was a hideous colour.... So armed with 3 cans of spray paint,  ( which I had in the craft room, yes, my hording tendencies have paid off.) and some fabric I had left over from another project.  I set to work whilst the sun was shining and the kids were busy painting. The base was sprayed, it took approximately 2 3/4 cans to cover.  Then I tacked the fabric onto the the top of the ottoman, to for a comfy seating area. And here it is...... trying to take a picture of something with the kids about just does not happen in our house.... and when one does it............ so does the other :) Now the hard