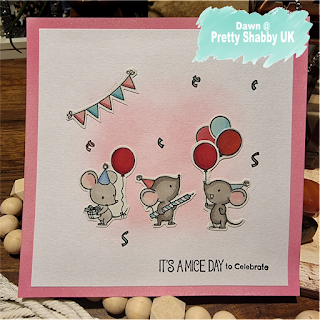
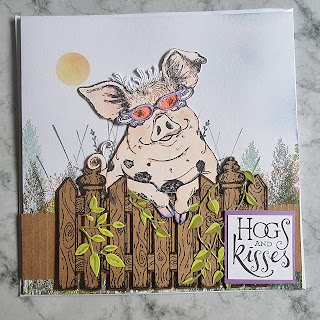
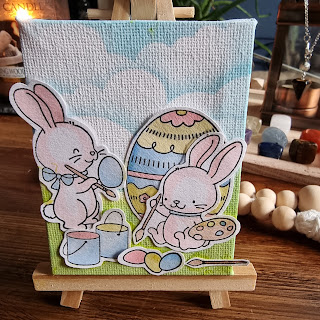
Pretty Shabby Uk
Pretty Shabby UK is a lovely little place where Homemade is made easy.
Friday, 22 July 2022
Easy Peasy Arrow Fold Card
Friday, 15 July 2022
Triple Point Easel Card Tutorial
Friday, 8 July 2022
Easy Slide and Reveal Steampunk Card Tutorial
Wednesday, 6 July 2022
Shadow Box Beach Themed Card Tutorial
I am delighted to say that i have been chosen as a guest designer for the Paper Funday Challenge. This month the challenge was "A day at the beach".
Monday, 27 June 2022
Showers of Love
Friday, 10 June 2022
Origami Shadow Box Fold Card Tutorial
Plain Lilac Paper – 5 ½” x 5 ½”
Single Side Spotty Paper – 5 ¼” x 5 ¼ “
Single sided Flower Pattern – 5” x 5”
Double sided Flower Paper – 5 ¼” x 5 ¼”
2 Mat and layer the papers, 1st Plain, 2nd Spotty and 3rd Floral single sided.
3 Using the double-sided piece – (floral side up), mark the centre of the paper.
4 Fold the corner points to touch the centre point, so there should only be the spotty paper seen.
5 Once all the corners have been folded in, fold back each point to the edge of the outer fold.
6 Adhere the sentiment.
7 Adhere the frame onto the card
8 Colour
and decoupage the flower and adhere on to the frame.
Hope you like
the card
Dawn
Saturday, 4 June 2022
Feathered With Sympathy Card
Thursday, 2 June 2022
Cardmaking Templates
Cardmaking
Templates
Creating a particular cardmaking template can help you to
make some really stunning cards plus it will serve as a reminder for you when
you need to make it again.
Not only do templates help you to see the required
measurements but it allows you to build up your confidence as you make them.
They don't need to be fancy and you don't need to be able to draw either (phew, because I am really really bad at drawing). So give it a try, I promise you it will be worth it.
Tips
Use some of your old scraps or card, if your like me, there will be loads knocking around
Make all your lines and instructions clear and bold, so that you will see what you need to follow
Store them safely in a folder to be re-used again and again whenever you need them. I find this particularly useful if it has been some time since I did a project, and need a little refresher on what to do.
This beautiful Japanese Dream Bridge Card has been created using a template I made some time ago,
and the result is very pretty. Its so
simple to make too…
The Side
Panel fold card was a little more difficult, when it can to matting, but I am happy with the outcome.
You can buy templates in many shapes and sizes, and from
many different sources and some of them are really spectacular...and
complicated...and EXPENSIVE!
Label the ones you create and store them safely in a ring
binder or poly pocket and keep them close to hand for whenever you need a new
card and you're stuck for ideas.
To get you started I have linked a couple of Templates that I
have designed below. Download them for free or use them to adapt to suit your
project.
Have a go at making your own template, it is worth giving it
a go before you spend money on something you can quite easily make yourself.
Friday, 20 May 2022
Japanese Dreams – Bridge Card - Tutorial
This has got to be my favourite card i have made so far in my card making journey.
It was so simple to make, but yet so effective
What i used:
White Card stock
Red Card Stock
Chinoiserie Chic Paper Collection
Spectrum Noir Classique Alcohol Maker (DR1,FS6)
Spectrum Noir Triblend Alcohol Markers (TB2, TB3, TB4)
Double sided tape
3d Foam Pads
1 Trim
white cardstock to 25 x 15cm, then score long side at 4cm, 8cm, 17cm and 21cm.
Mountain fold outer score lines, valley fold inner ones.
2 Trim
red card stock to cover the panels. Should
be 6 pieces.
4 pieces
of 3 ½ x 14 ½ cm (side panels)
1
piece of 8 ½ x 14 ½ cm (back panel)
1
piece of 3 x 17 cm (bridge panel)
3 Trim
the Umbrella paper. Should be 4 pieces. This is for the side panels.
4
pieces of 3 x 14cm
4 Trim
the Heron paper to cover back panel.
1
piece of 8 x 14cm
5 Trim
cherry blossom paper. This is for the bridge piece.
1
piece of 2 ½ x 16 ½cm
6 Adhere
red cardstock and patterned papers to the panels and the sentiment to Navy card
stock
7 Adhere
the two long lanterns to back panel, adhere the red lantern with 3d foam
8 Adhere
bridge panel to left front and right front panel
9 Adhere
the lady to the back of the bridge panel using 3d foam, and sentiment to front
of the panel with fans either side of the sentiment.
Shared with:-
Pammies inky pinkies challenges #2221
Hope you
like the card
Dawn
Friday, 13 May 2022
Side Panel Fold Card - With Template
I wanted to make a fun fold card and made this super amazing side panel fold card.
This one may look complicated but really it isn’t, all I would say is that precision is key for making this card.
The card fold is really different and very eye-catching with
all the different sides and levels.
The whole card folds flat and fits into a 5″ x 7″ envelope.
To make these cards I used:
White stock cardstock.
Gold cardstock
Spectrum Noir Midas - Metallic Pigment Inkpad - Gold
White cardstock (stamped in gold harlequin pattern)
Indigo Blu – Jubilee Special Stamps
I have entered this card into:-
The holly and ivy christmas challenge
Thursday, 17 March 2022
Super Easy Kit Kat Easter Cake
Oh my goodness how cute is this cake. Not only cute but super duper easy to make too..
Ingredients:
Directions:
1. Bake your favourite cake recipe for a two-layer, 8"
or 9" cake. (For this cake, I used Duncan Hines yellow cake mix.) Make
sure to even out your layers so there's some room left at the top for your
coconut.
2. Frost with your favourite icing. (For this cake, I used
Duncan Hines chocolate icing.)
3. Press the Kit Kat bars around the cake gently.
4. Place the coconut in a zippered plastic bag. Add drops of
green colouring (I used 4) and close the bag. Shake until the colour blends
evenly. Add more colouring if necessary.
5. Sprinkle the coconut over the top of the cake. Add the
mini eggs.
6. Tie a ribbon around the Kit Kat bars.
inspired by Made
in Melissa's Kitchen
Tuesday, 8 March 2022
A Gorjuss Little Birdie
I stamped the stamp on white stock card,
coloured it in with my DecoTime Aqua Markers, i choose a cute little green themed outfit, well it is nearly St Patricks Day. This was
set to one side to dry
For the main body of the card, i cut the green stock card to the bottom of the scallops, i used a cute little white with matching green stars designer paper .
Printed out "A little bird told me it's your birthday", because there was a bird on the card, which i backed with the green stock card,
I have shared this with: