Stamping Journal
Well now I have my stamps in order, I don't want to have to keep pulling them out every time a friend wants to have a look or every time that I want to create a project, so I have made a Stamping journal which I divided up into sections according to the theme.
I stared with a wire bound journal which can be bought from an stationery shop, in fact the one I used was from a pound store.
Carefully de-bind (not sure if that is a word but it fits) making sure that you do not stretch or bend the wire.
To make sure that I did not mess the papers and lose the holes, I added little paper dowels.
I added a monogram to personalise the pad a little.
I divided the note pad into sections by adding card dividers. This was just a piece of A4 card folded in half and trimmed to fit the page and the taped to secure.
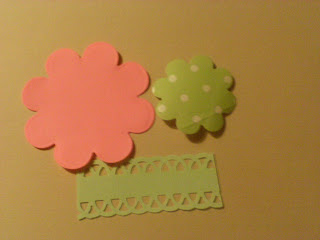
The little divider title embellishments were made by using my Bigshot and scalloped circle dies.
I used the 2nd and 3rd smallest size dies and the scraps of the co-ordinated paper.
The title bar was made by using a strip of paper and border punching across the top and bottom and them stamping the sections.
After sectioning of the book, I stamped all the stamps in the sections.
To finish of the book I added strips of ribbon.
and Voila...
Find out how I decided on storing my unmounted stamp HERE
Now I am off to see what my other crafty friends have been up to this week at Handmade Monday
I stared with a wire bound journal which can be bought from an stationery shop, in fact the one I used was from a pound store.
Carefully de-bind (not sure if that is a word but it fits) making sure that you do not stretch or bend the wire.
To make sure that I did not mess the papers and lose the holes, I added little paper dowels.
I removed and covered the front of the pad with some green and white spotty wallpaper.
To easily locate the binded holes I pierced holes in the front with a darning needle before I forgot where they were. It was a feel and prick kind of exercise.
Then I decorated the front cover with co-ordinating papers that were already in my stash (as I am still on my £0 challenge) to be honest I think that challenge has lead me to creating this project.
I added a monogram to personalise the pad a little.
I divided the note pad into sections by adding card dividers. This was just a piece of A4 card folded in half and trimmed to fit the page and the taped to secure.
The little divider title embellishments were made by using my Bigshot and scalloped circle dies.
I used the 2nd and 3rd smallest size dies and the scraps of the co-ordinated paper.
The title bar was made by using a strip of paper and border punching across the top and bottom and them stamping the sections.
After sectioning of the book, I stamped all the stamps in the sections.
To finish of the book I added strips of ribbon.
and Voila...
Find out how I decided on storing my unmounted stamp HERE
Now I am off to see what my other crafty friends have been up to this week at Handmade Monday


Your way is so pretty
ReplyDelete